
For years I have been taking notes for my own use — mostly on projects I worked on, especially around my home server project. Some time ago I thought of building a website to share my ideas, experiments, and knowledge with the world, but it never happened — even though I purchased my domain two years ago. Yesterday, I finally deployed this website using Hugo, and as my first post, I am writing about how I built it.
Choices#
We visit many different websites every day and have probably visited thousands over our lifetimes. Have you ever wondered how those websites are actually built? You may have heard of WordPress — the dominant content management system (CMS) — but there are many other ways to build a website. My first decision was choosing which framework to use, but there were several other choices to make before I could publish publicly. I have outlined those major decisions below.
Define the purpose
I will periodically post articles, so I primarily needed blogging features.
Decide on a name
I named the website Kasun’s Lab, since I will mainly be posting experiments and analysis.
Choose a domain and hosting
I already had a domain and a VPS, so I could deploy the website at no additional cost. I use Cloudflare for domain registration.
Website builder or custom code?
I prefer to have control over my work, but posting should also be convenient. After some research and testing, I chose Hugo for this website. It has a variety of themes to get started with rather than building from scratch, and I chose the Blowfish theme because I liked its design. Hugo can be installed on my laptop, and the static site can be hosted on the VPS for public access.
1. Install Hugo#
Windows 11#
I run Windows 11 on my laptop. Winget can be used to easily install Hugo on Windows. Open PowerShell with Administrator privileges.
# Install
winget install Hugo.Hugo.Extended

# Uninstall
# winget uninstall --name "Hugo (Extended)"
PS C:\Users\Kasun Herath> winget install Hugo.Hugo.Extended
Found Hugo (Extended) [Hugo.Hugo.Extended] Version 0.161.1
This application is licensed to you by its owner.
Microsoft is not responsible for, nor does it grant any licenses to, third-party packages.
Successfully verified installer hash
Extracting archive...
Successfully extracted archive
Starting package install...
Command line alias added: "hugo"
Successfully installed
PS C:\Users\Kasun Herath> hugo version
hugo v0.161.1-ea8f66a7ce988664dcc84c052fc96757042e2e4a+extended windows/amd64 BuildDate=2026-04-29T13:56:01Z VendorInfo=gohugoioDebian#
The Hugo package in the Debian repository is outdated.
sudo apt install hugo$ hugo version
hugo v0.111.3+extended linux/amd64 BuildDate=2023-03-16T08:41:31Z VendorInfo=debian:0.111.3-1So I had to manually install the latest version from the GitHub releases page.
# Download the latest version
wget https://github.com/gohugoio/hugo/releases/download/v0.161.1/hugo_0.161.1_linux-amd64.deb

# Install the deb package
sudo dpkg -i hugo_0.161.1_linux-amd64.deb

# Check the newly installed version
hugo version
$ hugo version
hugo v0.161.1-ea8f66a7ce988664dcc84c052fc96757042e2e4a linux/amd64 BuildDate=2026-04-29T13:56:01Z VendorInfo=gohugoioThe path for the manually installed Hugo version differs from the one installed via apt. You may get an error like the one below because Bash has cached the old binary location.
$ hugo version
-bash: /usr/bin/hugo: No such file or directory
You can check the location of the new installation like this:
$ which hugo
/usr/local/bin/hugo
To fix the issue, clear the Bash command cache:
hash -r$ hugo version
hugo v0.161.1-ea8f66a7ce988664dcc84c052fc96757042e2e4a linux/amd64 BuildDate=2026-04-29T13:56:01Z VendorInfo=gohugoioNow you can safely remove the downloaded .deb package.
rm hugo_0.161.1_linux-amd64.deb2. Creating the Website#
The steps below are for Debian, but they are similar on Windows. Where commands differ, I will add Windows-specific instructions.
Create a Hugo site#
Create a directory for the website.
mkdir -p ~/_myData/websites/hugo
cd ~/_myData/websites/hugo
Create a new Hugo site.
hugo new site kasunslab$ hugo new site kasunslab
Congratulations! Your new Hugo site is created in /home/kasun/_myData/websites/hugo/kasunslab.
Just a few more steps and you're ready to go:
1. Download a theme into the same-named folder.
Choose a theme from https://themes.gohugo.io/ or
create your own with the "hugo new theme <THEMENAME>" command.
2. Perhaps you want to add some content. You can add single files
with "hugo new <SECTIONNAME>/<FILENAME>.<FORMAT>".
3. Start the built-in live server via "hugo server".
Visit https://gohugo.io/ for quickstart guide and full documentation.Hugo creates a folder for the website. Navigate into it.
cd kasunslab3. Install the Blowfish Theme#
I chose the Blowfish theme because I liked its look and feel. You can browse a wide variety of free Hugo themes at their themes collection.
I prefer to install Hugo themes using Git. First, install git and configure your username and email address.
# On Debian
sudo apt install git
# On Windows
winget install --id Git.Git -e --source winget# Set your username and email address
git config --global user.name "Kasun Herath"
git config --global user.email "[email protected]"Add the Blowfish theme as a Git submodule.
git init
git submodule add -b main https://github.com/nunocoracao/blowfish.git themes/blowfish
Updating the installed theme is easy with Git.
git submodule update --remote --mergeIf you haven’t used Git before, it is an excellent version control tool worth learning. You can commit your changes like this:
git add .
git commit -m "Add Blowfish theme as submodule"
4. Configure Basics#
Note that some configuration options are theme-dependent.
In the root folder of your website, delete the hugo.toml (or config.toml if you are using an older version) file generated by Hugo, then copy the *.toml config files from the theme into your config/_default/ folder.
rm hugo.toml

mkdir -p config/_default
cp themes/blowfish/config/_default/* config/_default
rm config/_default/module.toml # if you installed using Hugo Modules
After copying the files, your config folder should look like this:
config/_default
├── hugo.toml
├── languages.en.toml
├── markup.toml
├── menus.en.toml
└── params.toml
If you did not use Hugo Modules to install Blowfish, add the line theme = "blowfish" to the top of your hugo.toml file.
# config/_default/hugo.toml

theme = "blowfish"
baseURL = "https://www.kasunherath.com/"
languageCode = "en"
# config/_default/languages.en.toml
title = "Kasun's Lab"
[params.author]
name = "Kasun Herath"
email = "[email protected]"
image = "img/kasun_herath.jpg"
imageQuality = 96
headline = "Something good is on the way…"
bio = "I am interested in economics, financial markets, and IT."
links = [
{ email = "mailto:[email protected]" },
{ github = "https://github.com/kasun-97" },
{ x-twitter = "https://x.com/KasunHerath97" },
{ youtube = "https://youtube.com/c/KasunHerath" },
]The [params.author] section controls how author information is displayed on the website. The profile image should be placed in the site’s assets/ folder. Links are displayed in the order they are listed.
# Create a folder for images
mkdir assets/img
Copy your profile image into the img folder.
Change the Favicon#
By default, Hugo uses the favicon bundled with the theme. You can easily generate custom favicons at https://favicon.io/. Place the extracted favicon files in the static directory.
static
├── android-chrome-192x192.png
├── android-chrome-512x512.png
├── apple-touch-icon.png
├── favicon-16x16.png
├── favicon-32x32.png
├── favicon.ico
└── site.webmanifest
Commit the new changes.
git add .
git commit -m "Complete basic configuration"
Run the Development Server#
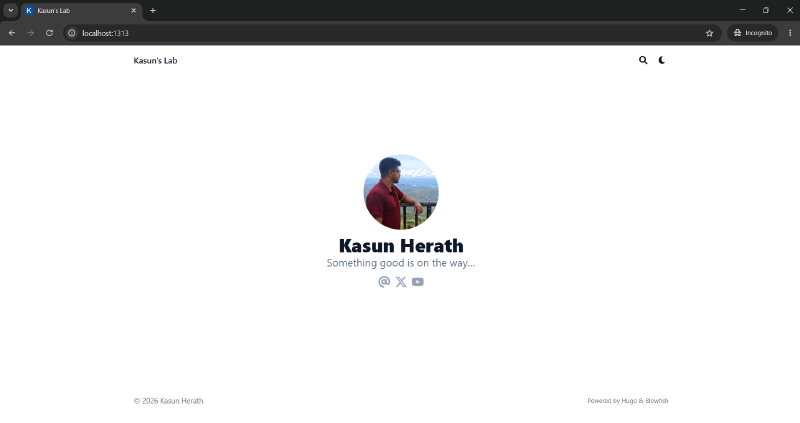
Before publishing, you can run the development server to preview the website locally.
hugo serverVisit http://localhost:1313/ from the same computer to view it. Without any posts, my website initially looked like this:
5. Creating the First Post#
The website directory structure should look something like this:
kasunslab
├── assets
│   └── img
│       └── author.jpg
├── config
│   └── _default
├── content
│   ├── _index.md
│   ├── about.md
│   └── posts
│       ├── _index.md
│       ├── first-post.md
│       └── another-post
│           ├── aardvark.jpg
│           └── index.md
└── themes
    └── blowfish
All posts are stored in the content/posts folder. I write my posts in Markdown inside my Obsidian vault.
Creating a Post#
I created the first post using the hugo command below. I used Hugo Page Bundles so I could easily include images in the post.
hugo new content/posts/i_built_a_website/index.mdThis creates a Markdown file with the following front matter:
+++
date = '2026-05-14T15:22:36+05:30'
draft = true
title = 'I Built a Website'
+++
Once you have written your content, change the draft parameter to false to make the post visible on the website.
Visit http://localhost:1313/posts/i_built_a_website/ to preview the post.
Show Recent Posts on the Home Page#
Set the showRecent parameter to true.
# config/_default/params.toml
[homepage]
  layout = "profile" # valid options: page, profile, hero, card, background, custom
  #homepageImage = "IMAGE.jpg" # used in: hero, and card
  showRecent = true
  showRecentItems = 5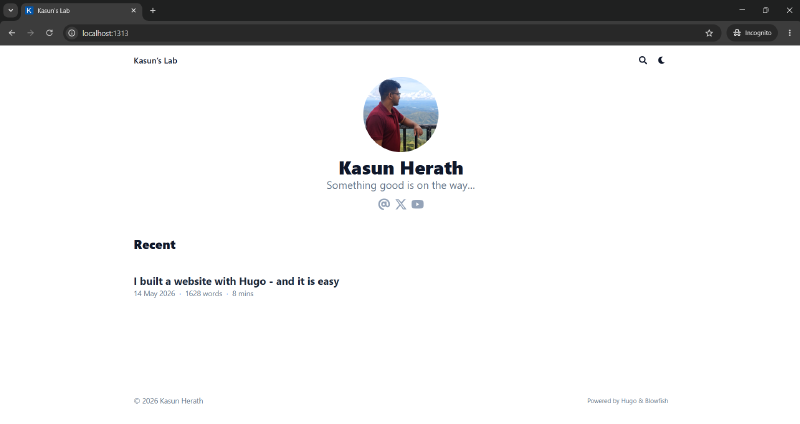
Publish the Website#
“When you publish your project, Hugo renders all build artifacts to the
publicdirectory in the root of your project. This includes the HTML files for every site, along with assets such as images, CSS, and JavaScript. The command is simple.” — Hugo Docs
hugoThe ready-to-deploy version of your website will be in the public folder. I sync this folder to the VPS to deploy the website.
6. Hosting#
There are many different ways to host a Hugo site. Since I already have a VPS, I deploy my website there.
You can use GitHub Pages to host your website at no cost.
VPS Configuration#
I installed Debian on the VPS. On the first boot, I created a user account and installed the required software.
Create a New User#
Log in as root first.
ssh root@<vps-ip>Update all installed packages.
apt update && apt upgrade -ySet the timezone.
timedatectl set-timezone Asia/ColomboCreate a new user and grant them sudo privileges.
# Make sure sudo is installed
apt install sudo

# Create a new user and set a password
adduser <username>

# Grant the user sudo privileges
usermod -aG sudo <username>
Log out from root and log back in as the new user.
ssh <username>@<vps-ip>Set Up a Firewall and Disable Root SSH Login#
Keeping the VPS secure is important. I set up a firewall using UFW, as it is straightforward to configure.
sudo apt install ufw -y
sudo ufw allow 22/tcp  # Allow SSH port 22
sudo ufw enable
Next, disable SSH login for the root user by editing /etc/ssh/sshd_config and setting PermitRootLogin to no.
# /etc/ssh/sshd_config

PermitRootLogin no
Restart SSH.
sudo systemctl restart sshVerify the configuration.
sudo sshd -T | grep permitrootlogin$ sudo sshd -T | grep permitrootlogin
permitrootlogin noInstall Applications#
I installed the following applications, which I use frequently.
sudo apt install \
neovim \ # My preferred text editor
tree \ # Displays directory structures as a tree
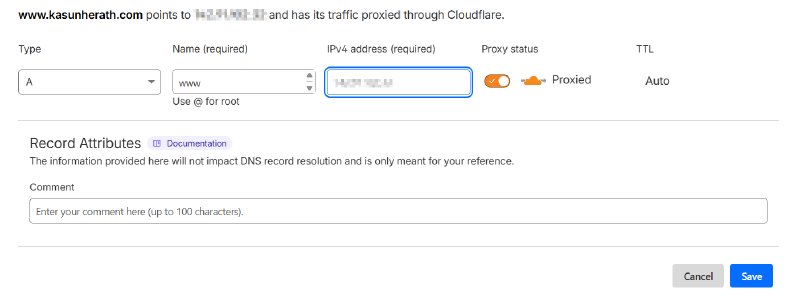
tmux # Terminal multiplexerDNS Configuration#
I manage DNS through Cloudflare. You need to configure DNS records so that visitors are directed to the VPS where the website is hosted.
Set Up a Web Server#
A web server is required to serve the website to the world. There are several popular options, but I chose Caddy for its simplicity. I may revisit this choice later as my needs grow. One of the most useful features of Caddy is that it handles SSL/TLS certificates automatically via Let’s Encrypt.
Install Caddy.
sudo apt install caddyOpen ports 80 and 443 to make the website publicly accessible.
# Open ports
sudo ufw allow 443/tcp
sudo ufw allow 80/tcp

# Reload the UFW config
sudo ufw reload
Configure Caddy, pointing it to the root folder of your website. I store the website in /var/www/kasunslab on the VPS.
{
        email [email protected]
}

www.kasunherath.com {
        root * /var/www/kasunslab
        encode zstd gzip
        file_server
        log {
                output file /var/log/caddy/access.log
        }
}
Reload the Caddy configuration.
sudo caddy fmt --overwrite /etc/caddy/Caddyfile  # Fix formatting
sudo caddy reload --config /etc/caddy/Caddyfile
Create the website directory and set the correct permissions.
# Create the folder
sudo mkdir -p /var/www/kasunslab

# Grant the user appropriate permissions
sudo chown -R <username>:www-data /var/www/kasunslab/
Sync the Local public Folder to the VPS#
On Linux, I use Rsync to sync my local folder to the VPS.
hugo build --gc --minify

rsync -avz --delete public/ <username>@<vps-ip>:/var/www/kasunslab/
On Windows, Rclone can be used to sync the folder easily.
hugo build --gc --minify# Without configuration
rclone sync --interactive --sftp-host <vps-ip> --sftp-user <username> --sftp-ask-password public/ :sftp:/var/www/kasunslab/
# With configuration
rclone sync --interactive public/ <yourremote>:/var/www/kasunslab/You will need to configure Rclone first.
rclone configOnce the files are synced to the VPS, the website is accessible via the domain name you configured. In my case, that is www.kasunherath.com.
Next Steps#
I plan to gradually add more features to the website — menus, tags, a comment section, and more. I will also update this post as things evolve.
For content, I will share things I think are worth putting out there. This post is on the technical side, but not all my posts will be.
Thank you for reading!
2025-06-16
- I enabled page view and likes with Google Firebase.